
TL;DR: Professional water damage restoration follows six stages: a damage inspection and water classification, standing water extraction, structural drying with air movers, dehumidification to pull moisture from building materials, moisture verification testing to confirm dryness, and reconstruction of anything that couldn’t be saved. The entire process typically takes 3 to 7 days for drying alone, with reconstruction adding time depending on scope. Every stage is governed by the IICRC S500 Standard for Professional Water Damage Restoration.
You’re standing in a wet room, the floor is soaked, and someone just told you a restoration crew is on the way. You want to know what they’re actually going to do, and whether your house will ever look normal again. The short answer is yes, in most cases. But the process is more methodical than most homeowners expect. It’s not just shop vacs and fans. Here’s every stage, in order, with the specifics that actually matter.
What happens during the initial inspection?
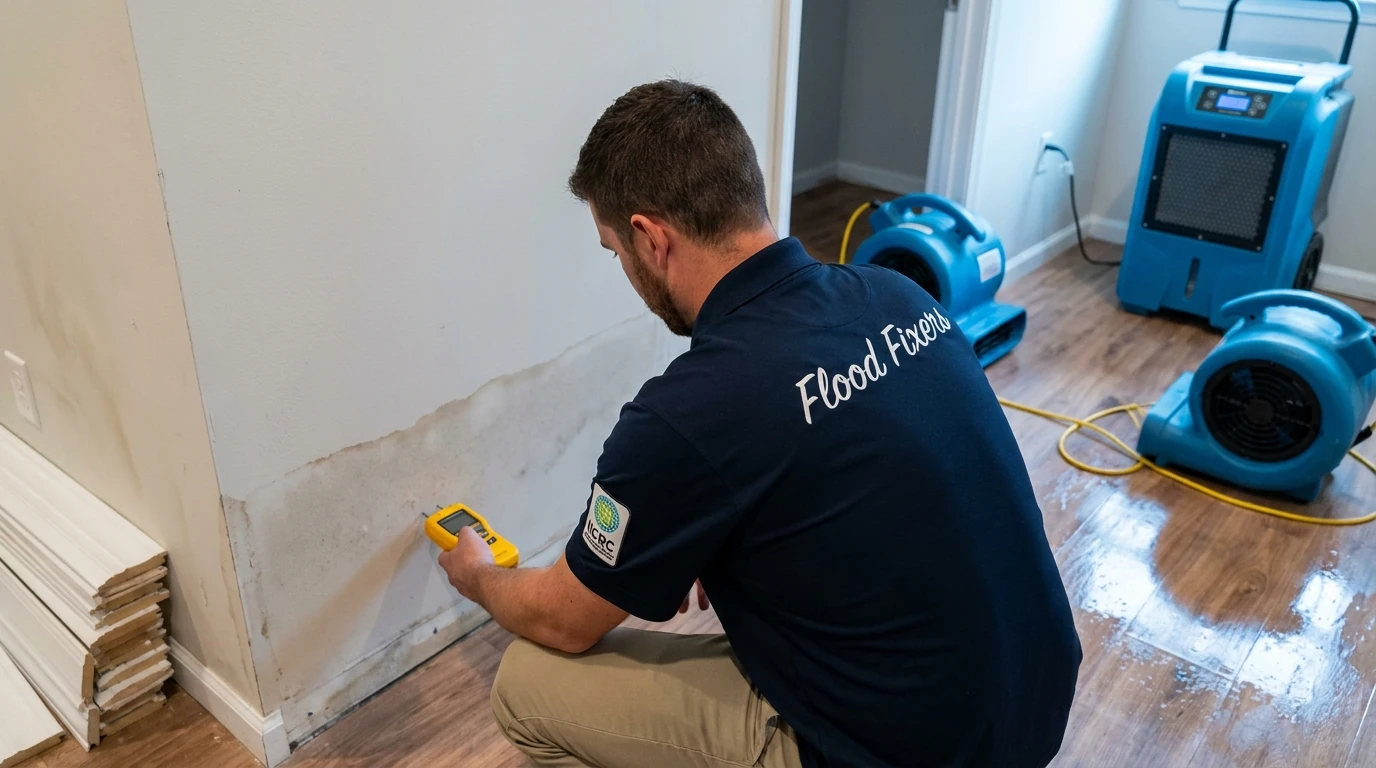
The first thing a restoration crew does is classify the water and map the damage, before a single piece of equipment gets turned on. This inspection determines every decision that follows.
Technicians classify the water source into one of three categories. Category 1 is clean water from a supply line or appliance. Category 2, called gray water, comes from dishwashers, washing machines, or toilet overflows without solids. Category 3, also called black water, is sewage, floodwater, or any water that has sat long enough to become grossly contaminated. The category changes the PPE required, the disposal protocols, and what materials can be dried versus what must be removed.
At the same time, the crew uses a combination of tools to map moisture: pin-type and pinless moisture meters to read surface and subsurface moisture content in drywall and wood, a thermal infrared camera to spot hidden saturation behind walls and under flooring, and sometimes a thermo-hygrometer to establish the baseline humidity of the space. This data becomes the drying log, the record that documents starting conditions and tracks progress every day until the job is done. If you’re filing an insurance claim, that log is part of what your adjuster will want to see. (For more on what insurance typically covers, see our guide to homeowners insurance and water damage.)
How do professionals extract standing water?
Water extraction removes the bulk of standing water, usually within the first hour or two on-site. This step has the single biggest impact on total drying time.
For most residential losses, crews use a truck-mounted extractor: a high-powered vacuum unit built into the service vehicle that pulls water through a hose and into an onboard waste tank. Truck mounts generate significantly more suction than portable units and can remove hundreds of gallons quickly. For areas a truck mount can’t reach, finished basements, upper floors, tight crawlspaces, a portable extraction unit steps in.
After the standing water is gone, technicians use weighted extraction tools on carpet and padding. These tools press down into the carpet pile and pull water that suction alone can’t reach. In most cases, carpet can be saved if extraction happens within 24 to 48 hours and the water was Category 1 or 2. Carpet padding almost always gets removed and discarded, it holds water like a sponge and dries too slowly to be worth saving. Hardwood flooring is evaluated case by case: the longer it’s been wet and the more it has cupped or buckled, the less likely it is to dry flat.
If you had a burst pipe and haven’t already, check our burst pipe emergency checklist, there are steps you can take before the crew arrives that reduce extraction time.
How does structural drying actually work?
Structural drying is the phase most homeowners underestimate. Once the standing water is gone, the building materials themselves, drywall, framing, subfloor, insulation, are still saturated. Getting that moisture out requires moving air across every wet surface continuously.
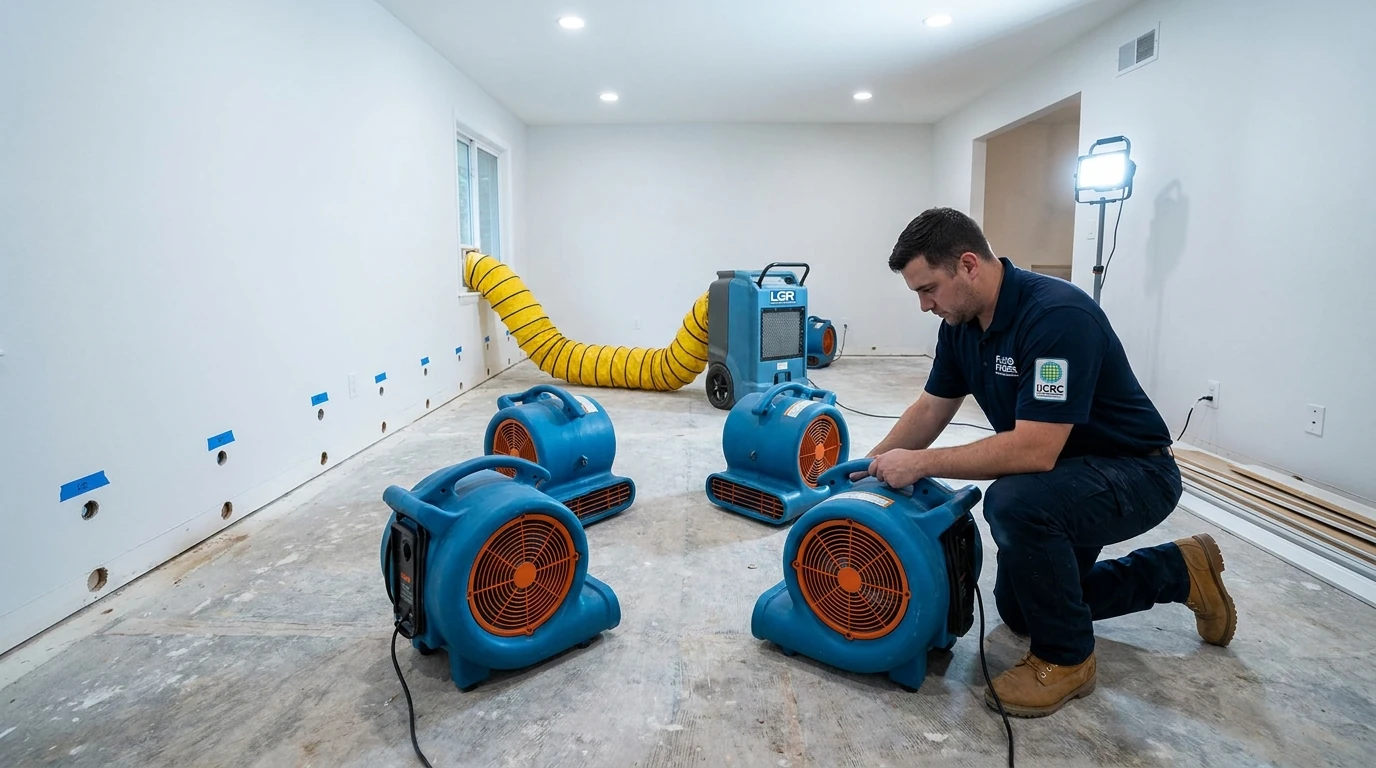
The primary tools are axial air movers, sometimes called snail fans or low-profile air movers. These direct high-velocity airflow across wet surfaces, accelerating evaporation. A typical residential water loss might require 1 air mover per 50 to 100 square feet of affected area, placed at a 45-degree angle to the baseboard to maximize coverage across floors and lower wall cavities. Crews also use desiccant or refrigerant dehumidifiers to capture the moisture that the air movers lift into the air, without dehumidifiers running simultaneously, you’re just moving humid air around.
For water that has migrated inside wall cavities, technicians drill small holes (typically 1 to 2 inches in diameter) at the base of the wall or remove baseboard to inject air directly into the cavity. This is called injecti-dry or wall cavity drying. The holes are patched during reconstruction. Skipping this step and just drying the surface is one of the most common mistakes in DIY drying, the wall face reads dry while the cavity stays wet for weeks.
The IICRC S500 standard establishes drying goals based on the material type and its equilibrium moisture content in normal conditions. For most wood framing, the target is below 19% moisture content. For drywall, the goal is typically below 1% using a pin meter. Crews check readings every 24 hours and adjust equipment placement based on the data.
How do technicians verify that everything is actually dry?
Moisture verification is the step that separates a properly closed job from one that leads to a mold call six weeks later. Drying is not complete when the floor feels dry to the touch, it’s complete when moisture meter readings across all affected materials reach the IICRC S500 drying goals for that material class.
At the end of each drying day, a technician walks the entire affected area with a moisture meter and logs readings at every monitoring point established during the initial inspection. The readings get compared against the baseline from day one and against the target drying standard. If readings are still elevated in a wall cavity or subfloor, equipment stays and gets repositioned. If readings have plateaued and aren’t dropping, that usually means there’s still a moisture source, a slow leak, a failed vapor barrier, or an area that wasn’t fully extracted.
When all readings hit target, the crew documents the final moisture readings, photographs the equipment removal, and issues a drying completion report. That report matters for your insurance claim and for any future buyer’s disclosure. Keep a copy.
Mold can begin developing in as little as 24 to 48 hours on wet organic materials. If drying takes longer than expected or wasn’t started promptly, a post-drying mold assessment may be warranted. Our post on how quickly mold grows after water damage covers the timeline in detail.
Does water-damaged drywall always need to be replaced?
Not always, but more often than most homeowners want to hear. Whether drywall gets dried in place or removed depends on the water category, how long it was wet, and whether it can reach drying goals without demolition.
Category 1 water that saturated drywall for less than 24 to 48 hours can often be dried in place using wall cavity drying techniques, provided moisture readings are trending down consistently. Category 2 or 3 water contamination almost always requires removal, because the gypsum and paper face absorb contaminants that can’t be dried out. Similarly, drywall that has been wet for more than 72 hours often shows paper delamination, surface softening, or mold growth, at that point, drying it in place is slower and riskier than cutting it out.
When drywall does come out, the crew removes it in controlled sections, typically cutting 12 to 24 inches above the visible waterline to expose the full wet area. Insulation behind wet drywall is almost always discarded; fiberglass batts and especially cellulose insulation hold moisture and can’t be reliably dried in place. Once the cavity is open and dry, reconstruction begins.
What does the reconstruction phase involve?
Reconstruction is the final phase: putting back everything that was removed or damaged during the loss and the drying process. This includes framing repairs, insulation replacement, drywall hanging and finishing, flooring installation, painting, and trim work.
The scope depends entirely on what was removed. A small bathroom leak might require only a drywall patch and a paint coat. A Category 3 flood that affected a finished basement could mean full drywall replacement, new flooring, rebuilt cabinetry, and electrical inspection. Before reconstruction starts, the space should be fully dry and have passed moisture verification, building over wet materials is how you get mold inside finished walls.
A restoration company that handles both the mitigation (drying) and the reconstruction phase can simplify the insurance process significantly. You’re working with one contractor, one scope of work, and one point of contact for the adjuster rather than coordinating a handoff between a mitigation company and a separate general contractor.
If you’re trying to understand how long the full process takes from start to finish, our guide on how long water damage restoration actually takes breaks down realistic timelines by loss size.
For a professional assessment of your specific loss, including moisture mapping and a written scope, contact Flood Fixers at (855) 204-1124. They provide 24/7 emergency service and are IICRC Certified and EPA Lead-Safe Certified.
About Flood Fixers
Flood Fixers is an IICRC Certified, EPA Lead-Safe Certified restoration company serving San Diego, CA and surrounding communities including Chula Vista, Carlsbad, Escondido, and Oceanside. Their crews handle water damage mitigation, flood cleanup, burst pipe response, and full reconstruction for residential and commercial properties. Licensed and insured. Available 24/7 for emergency response. Reach them at (855) 204-1124.